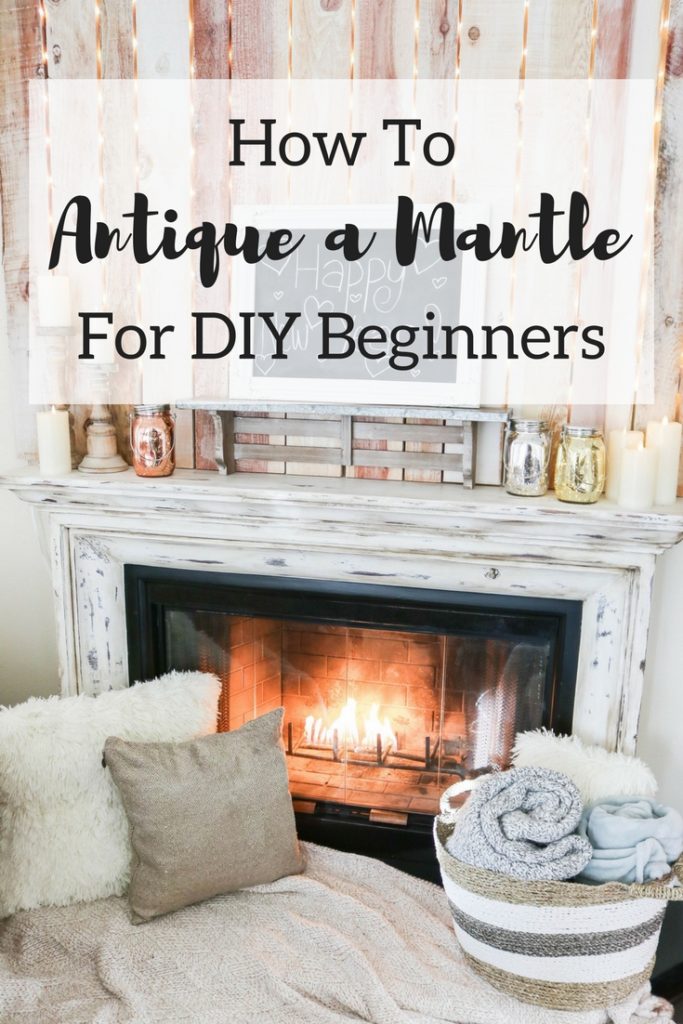
I want to preface this post by stating that we are major beginners when it comes to DIY. We always have grand visions of things we want to DIY but 1) we rarely get around to it and 2) they don’t come out the way we envisioned, but really, we just never get around to it. DIYing anything around our house always seems like this big complicated matter that we don’t have the time or skill for. That’s why I’m surprised we started our home DIY with a pretty large project: our mantle. While we love almost everything about the home we moved into, we really don’t love the living room. It’s an awkwardly shaped space, doesn’t get the best light, and is just too dark and heavy. We made some minor changes like moving around the placement of the couches and putting up lighter curtains, but the dark mantle was the biggest change that needed to be made. One day we got a burst of energy and inspiration and just went for it! We didn’t really go about it in a smart way. We probably should’ve done some research and tested out the methods on a small area or other object first, but we didn’t. We just did what sounded like would make sense and improvised as we went along. Due to this, the process took a little longer than it should’ve, but the trial and error taught us what needs to be done to achieve an antique look. It also taught us that there is no need to fear. Even if you mess up, it is always fixable. If an antiqued distressed look is what you’re after, mistakes actually add to the charm, so feel free to just go for it like we did!
One more thing before we get into the tutorial, we seem to have completely forgotten about our blog during this DIY process, because we didn’t take a before photo and took the WORST during photos. Apologies in advance for these terrible photos!
How To Antique a Mantle for DIY Beginners


The Details:
Things You’ll Need:
Paint (2 different contrasting shades if desired. We like the look of chalk paint for this and it’s also easy to sand off, but you can use whatever you like)
Paint brushes
Painters tape
Rags
If you’re lazy like us: Additional tools to make distressing easier. An electric sander is best, but you can use a screwdriver in a pinch (that’s what we used)
Skill Level Needed:
Little to none (I especially have no skills. Bassam was pretty shocked I was capable of this)
Approx Cost:
$75. The nice thing is you won’t use all the materials, so you can use the paint/primers/finishers for lots of future projects
Approx Time:
2-3 evenings (especially to factor in drying times)
The Steps:

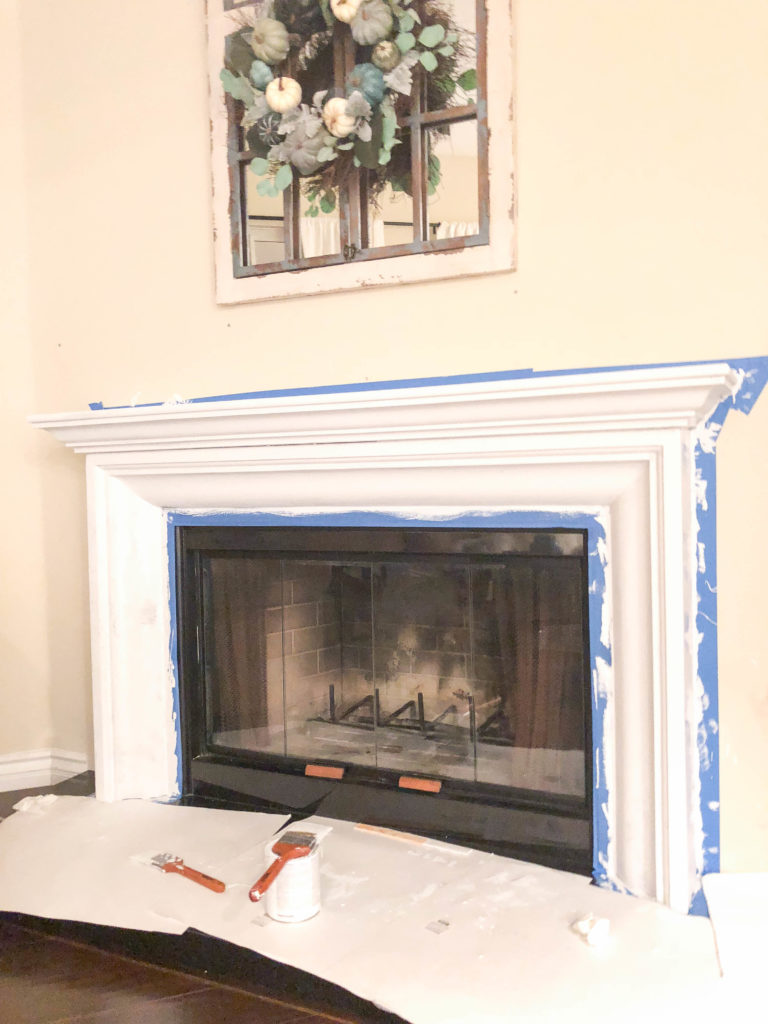
The BEFORE
1. Prep
Tape up the area with painters tape. Apply the deglosser according to the instructions. I probably should’ve worn gloves during this step, but I didn’t realize it at the time. I recommend you do!
2. Apply the paint
If you choose to do two colors to achieve a bit of a contrasting look, paint the darker color first so that it’ll show through when you’re sanding. We actually did white on bottom and a cream color on top because we preferred that look. Don’t worry so much about applying the paint perfectly. It doesn’t really matter because it’ll give it more of a rustic look. Plus you’re going to be distressing it later so you won’t be able to tell if the paint strokes aren’t perfect.
3. Sand and distress


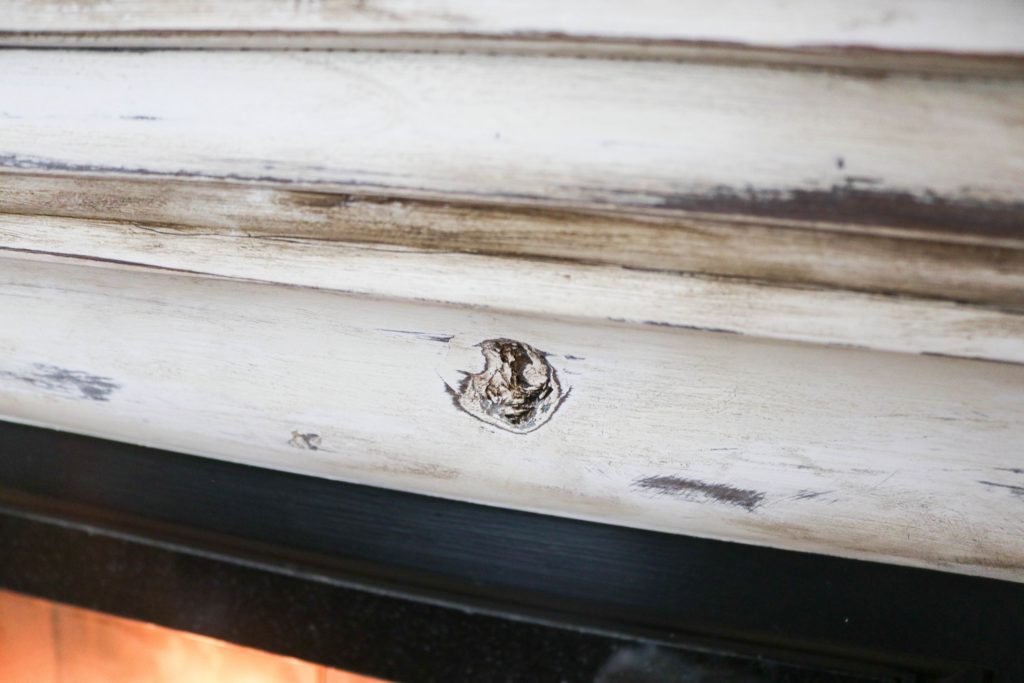
This was achieved with a hammer
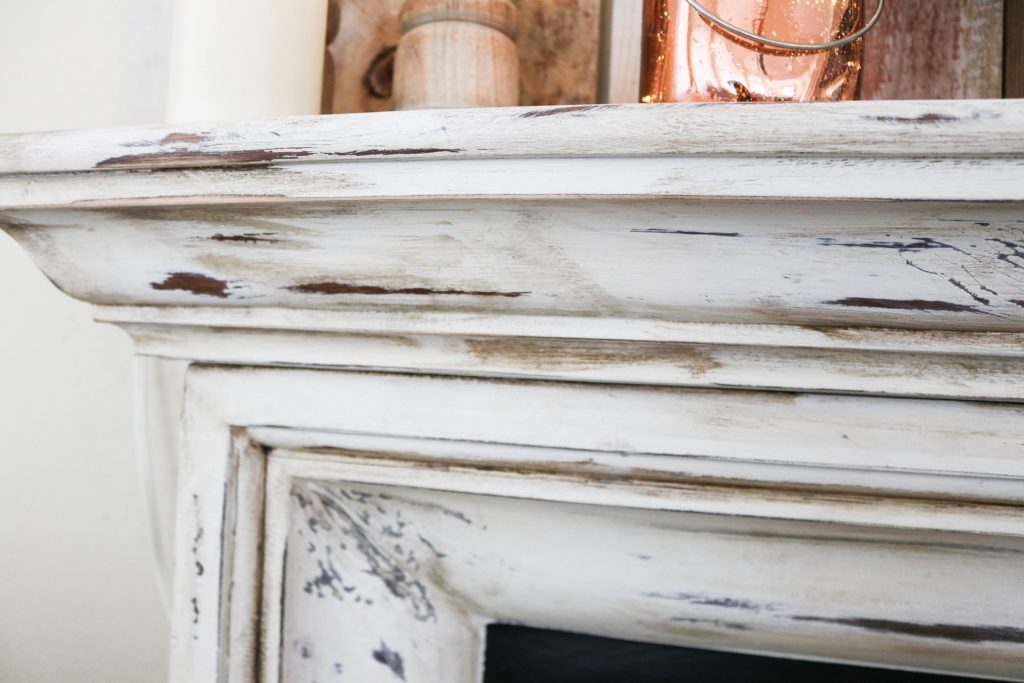
This part is fun to get all your aggression out! You can use the sandpaper, the electric sander, a screwdriver, a hammer, or a combination of all of them. Really focus on areas that naturally would wear the most with time, such as the corners and edges. We went all out and kind of did it all over, but we were going for a really distressed look. If you want this to look more subtle, just focus on the corners and leave the large areas alone. We also kinda banged up some spots with the screwdriver to get the wood to chip. We liked the distressed look that added.
The method I found to be easiest is “wet sanding”. I submerged the sandpaper in water fully and noticed it took no effort at all to sand away sections. It also helped preserve the sandpaper a bit so we didn’t have go through so many pieces. I recommend wearing a mask during this step so you don’t inhale any dangerous fumes.
4. Apply the finishing wax
Apply according to the directions. You can also do this after painting, but it might make your distressing work a little harder. We decided to just do it after we were done with our distressing,
5. Get creative with the antiquing wax
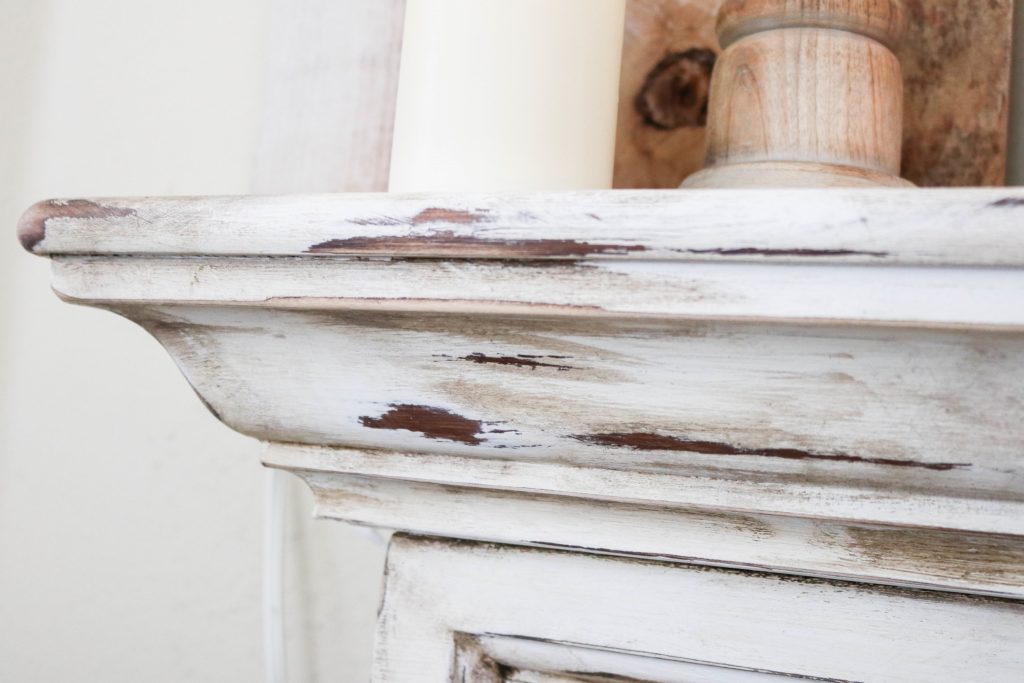

This part was so fun! Paint the antiquing wax in sections that you want to darken, wait a few seconds, and then wipe it off. It’ll give it a beautiful antique look! Work in small sections and don’t wait too long to wipe it off, otherwise you’ll have to work really hard to get it off. Don’t rub at it too much, otherwise I feel like it gives it a dirty look. Experiment with light applications first to see what you think of the look, before applying it more thickly. It does take a little getting used to working with. Focus on applying the paint in areas that you think would naturally darken over time, like creases and edges. We also kind of put it on all over in random streaks. If I could go back, I would focus on putting it on a little more uniform and in one motion, so that it kind looks like this amazing mantle. Don’t worry so much about messing this up. If you don’t like how it looks, it’ll remove pretty easily with water.
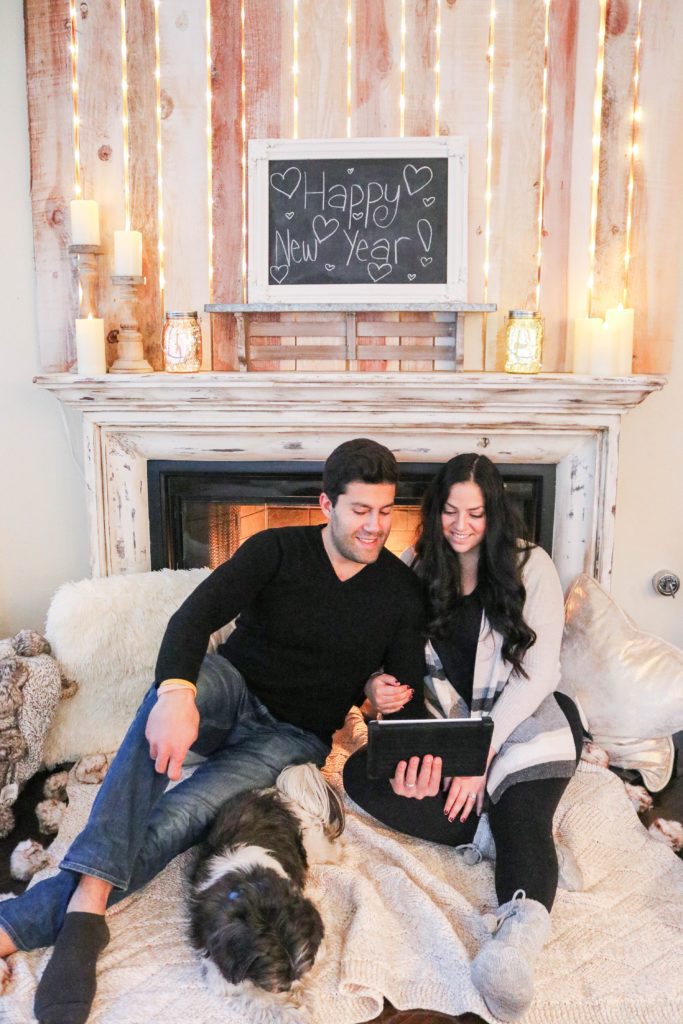
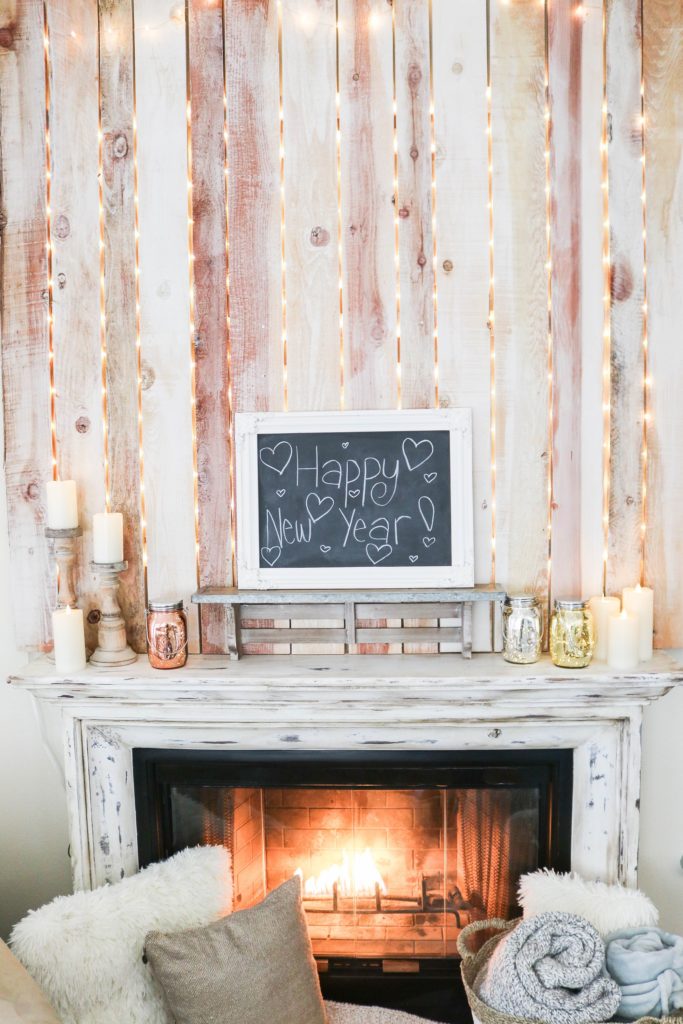
And that’s it! See, pretty easy! I’m looking forward to doing and sharing more easy DIY projects in the future! We will also be sharing soon how we created the “fence” that we put up over the mantle. In the meantime, check out how to DIY photo ledges with this post!
Did you like this post? Please pin it!
Leave a Reply